
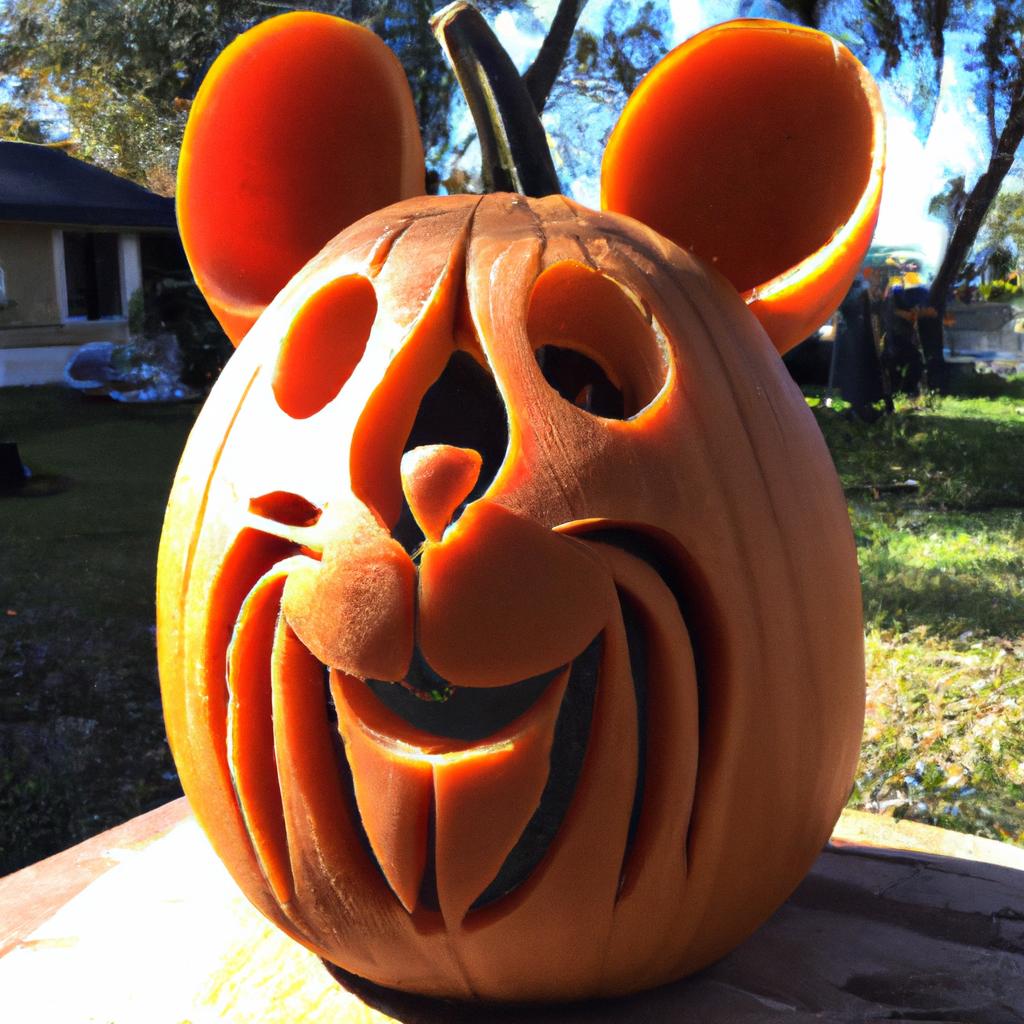
Halloween is just around the corner, and along with it comes the spooky and exciting tradition of pumpkin carving. For years, families have been gathering around the table, carving out their favorite spooky designs and lighting them up to display for all to see. However, in recent years, a new trend has emerged – carving Disney characters, and more specifically, the beloved Mickey Mouse.
Mickey Mouse is a popular character that has been around for generations, and it’s no wonder that people are now incorporating him into their Halloween decorations. But why should you consider carving a Mickey Mouse pumpkin this Halloween? The answer is simple – it’s a fun and creative way to show your love for Disney and add some magic to your Halloween festivities.
In this article, I’ll guide you through the steps of carving a Mickey Mouse pumpkin, from selecting the right pumpkin to adding finishing touches. You’ll learn the importance of having the right tools, following a pattern, and adding your personal touch to make your creation stand out. So, let’s get creative and have some fun carving a Mickey Mouse pumpkin this Halloween season!
Materials Needed
Pumpkin Carving Tools
When it comes to carving a Mickey Mouse pumpkin, having the right tools is crucial to achieving the desired result. Some of the essential pumpkin carving tools include a serrated knife, a scoop, a carving saw, and a drill. These tools can be found at most hardware and craft stores.
Pumpkin Selection
Choosing the right pumpkin is just as important as having the right tools. When selecting a pumpkin, it’s essential to choose one that is firm, symmetrical, and has a flat bottom. This will make it easier to carve and display. It’s also important to choose a pumpkin that is the right size for your design. A smaller pumpkin may be more challenging to carve, while a larger one may take longer to hollow out.
Pattern Stencils
Using a pattern stencil is essential when carving a Mickey Mouse pumpkin. You can find a variety of Mickey Mouse pumpkin carving stencils online or at craft stores. These stencils come in different sizes and designs, and you can choose one that fits your pumpkin size and your skill level. It’s important to print out or purchase a stencil that is the correct size for your pumpkin to achieve the best results.
Other Materials
Other materials that you may need for carving a Mickey Mouse pumpkin include a marker, tape, and a candle or LED light to illuminate your creation. Once you have all the materials, you’re ready to start carving your Mickey Mouse pumpkin! But before you begin, let’s talk about how to prepare your pumpkin for carving.
Preparing the Pumpkin
Cleaning and Hollowing Out the Pumpkin
Before you can start carving your Mickey Mouse pumpkin, you need to make sure it’s clean and hollowed out. Here are the steps to follow:
- Cut off the top of the pumpkin using a sharp knife. Make sure to cut at an angle so that the lid doesn’t fall inside the pumpkin.
- Using a large spoon or scoop, remove the seeds and strings from the inside of the pumpkin. You can also use a scraper or ice cream scoop to make the task easier.
- Once the inside is mostly clean, use a scraper or spoon to carefully scrape the inside walls of the pumpkin until it’s smooth and clean.
- If you plan on lighting up your pumpkin, you may need to make the bottom of the pumpkin flat and even to keep the candle from tipping over. Use a knife or scraper to remove enough of the pumpkin’s bottom to create a flat surface.
Tips for Making Your Pumpkin Last Longer
Once your pumpkin is cleaned and hollowed out, you’ll want to make sure it lasts as long as possible. Here are some tips to help:
- Coat the inside and cut edges of the pumpkin with petroleum jelly or cooking oil to help seal in moisture and slow down the decay process.
- Keep your pumpkin in a cool, dry place to prevent it from drying out too quickly. Avoid placing it in direct sunlight or near a heat source.
- If you’re not going to be lighting up your pumpkin, you can treat it with a bleach solution to help kill bacteria and prevent mold growth. Mix one tablespoon of bleach per quart of water, and spray or wipe the solution onto the pumpkin’s inside and cut edges.
By following these steps and tips, you can ensure that your Mickey Mouse pumpkin stays fresh and vibrant for as long as possible.
Carving the Mickey Mouse Design
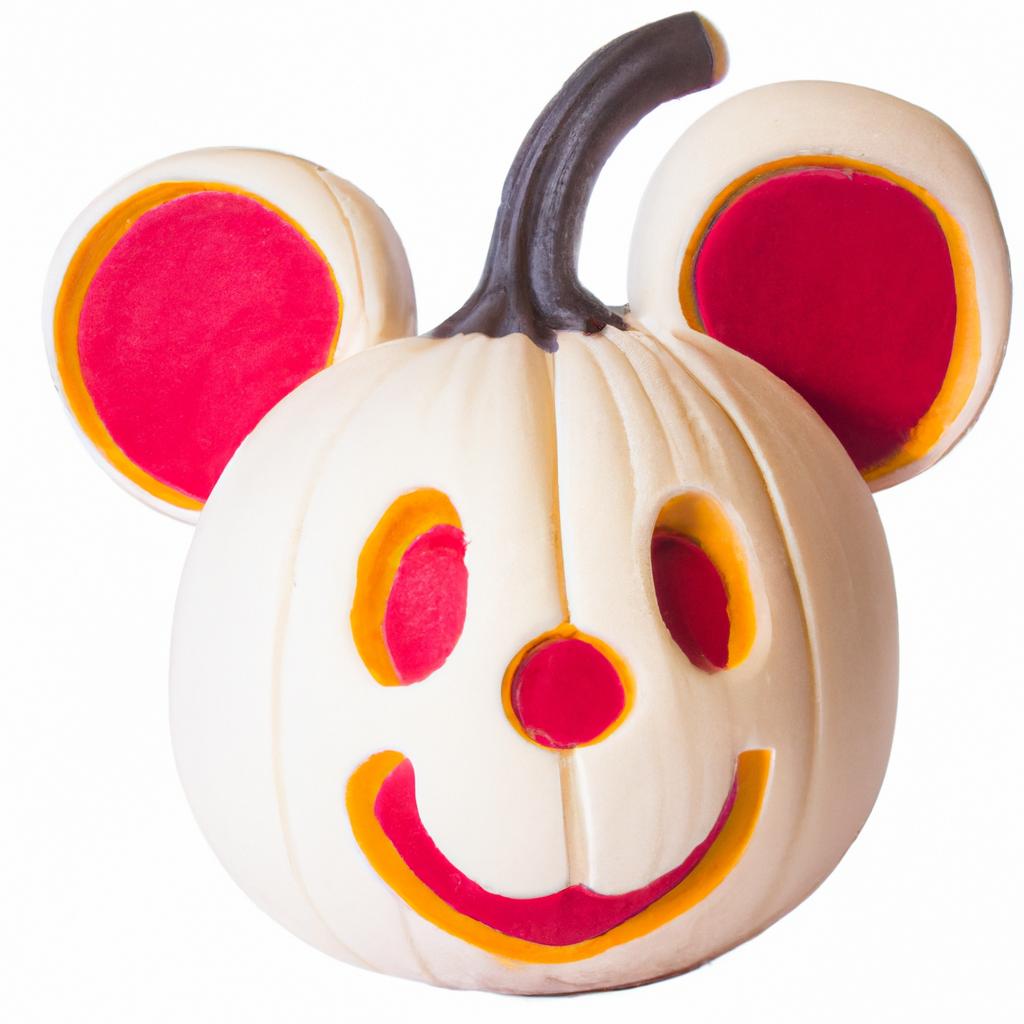
Using a Pattern Stencil
Having a pattern stencil is crucial when carving a Mickey Mouse pumpkin. It ensures that the design is precise and accurate. You can either purchase a pre-made pattern stencil or make one yourself. To make a pattern stencil yourself, print out an image of Mickey Mouse and trace it onto a piece of paper. Then, cut out the design with scissors or a craft knife.
Step-by-Step Instructions
Once you have your pattern stencil, it’s time to start carving. Follow these simple steps to create your Mickey Mouse pumpkin:
- Cut off the top of the pumpkin and scoop out the insides.
- Tape the pattern stencil onto the pumpkin, making sure it’s centered.
- Use a pin or needle to poke holes along the lines of the pattern stencil.
- Remove the stencil and connect the dots with a marker or pen to create the outline of the design.
- Use a small serrated knife to carefully cut out the design, following the outline.
- Clean up any rough or jagged edges with a carving tool or sandpaper.
- Add final touches like a carved-out mouth or nose if desired.
Handling Carving Tools
When carving a pumpkin, it’s essential to handle the carving tools with care. Always use a serrated knife specifically made for pumpkin carving, as it’s less likely to slip and cause injury. Be sure to carve away from your body and keep your hands and fingers away from the blade. If you’re unsure about your carving skills, consider using a pumpkin carving kit that includes safety tools and instructions.
By following these steps and handling the tools with care, you’ll have a stunning Mickey Mouse pumpkin that will impress your friends and family.
Adding Finishing Touches
Enhancing the Carved Design
Once you’ve carved your Mickey Mouse pumpkin, it’s time to add some finishing touches to make it stand out even more. One way to do this is by adding lights to your creation. You can purchase battery-operated lights specifically designed for pumpkins or use regular Christmas lights for a unique effect. Place the lights inside the pumpkin, and watch as your Mickey Mouse design comes to life in the dark.
Another way to enhance your carved design is by adding accessories. Consider purchasing fake spider webs, plastic spiders, or other Halloween-themed decorations to place around your pumpkin. This will make your display even more festive and fun for your family and friends.
Displaying the Finished Product
Now that you’ve completed your Mickey Mouse pumpkin, it’s time to display it for all to see. Find a safe and visible spot in your home or yard where you can showcase your creation. Consider placing it on a table or stand so that it’s at eye level and easy to see. If you have multiple pumpkins, try grouping them together to create a spooky and fun display.
Don’t forget to take pictures of your creation and share them on social media or with friends and family. Your carved mickey mouse pumpkin is sure to be a hit and a great conversation starter at any Halloween gathering.
Conclusion
In conclusion, carving a Mickey Mouse pumpkin is a fun and creative way to add some Disney magic to your Halloween festivities. It’s a great activity for families or friends to do together and can bring out your creative side. By following the steps outlined in this article, you’ll be able to create a unique and impressive Mickey Mouse pumpkin that will be the envy of all your neighbors.
Remember, selecting the right pumpkin, having the right tools, and following a pattern are key to carving a successful Mickey Mouse pumpkin. Don’t forget to add your personal touch to make your creation stand out, whether it’s by incorporating lights or other accessories.
Overall, Mickey Mouse pumpkins are a great way to show your love for all things Disney and Halloween. So, grab your carving tools, put on some spooky music, and let your creativity run wild. And, don’t forget to share your creations with us on mousefaqs.com! Happy Halloween!